
Squash Book Project
I attended a crop last month and learned that they would be making "Squash Books" this time. It looked like a really cute project that Aly and I could both do, so we signed up to go together.
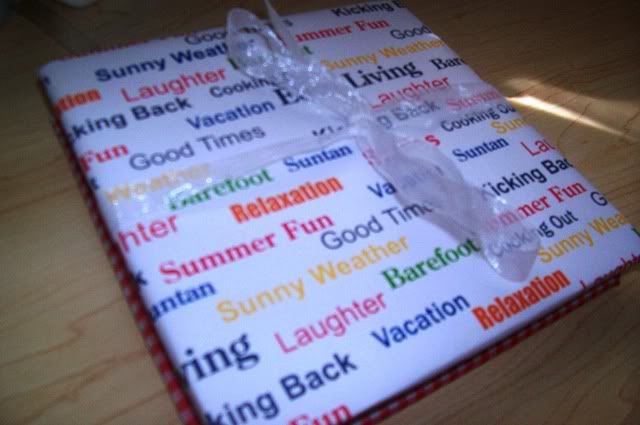
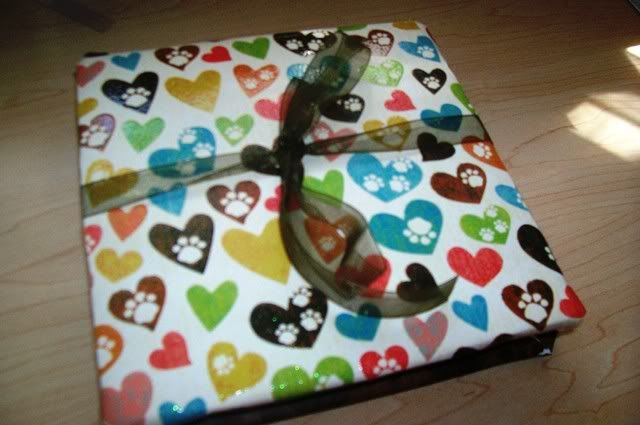
 I wasn't sure exactly how it would work, so we made sure to find coordinating paper we wanted to use for our projects. I brought bright cardstock and a pack of "summer" paper from the Dollar Tree. Aly went with the DCWV Pets Stack since she takes a lot of pictures of the animals. Even though I'm posting this like a week later, I'm dating back to the day we actually did it. I'm OCD like that.
What you need:
2 pieces of 7x7 foam core -- this is the stuff science project displays are made of. I suppose chipboard would work too, or the backing from a legal pad or other cardboard packaging.
2 pieces of 12x12 patterned paper -- this will be cut to 10x10 and used for the front and back cover of your album. I recommend NOT using heavyweight paper for the cover as Aly had trouble folding the pet paper around the foam core and keeping it taped down.
3 pieces of 12x12 cardstock -- the examples used one color to form the basis of the pages. Aly and I both mixed it up with three different colors that coordinated with our patterned paper.
5-6 more pieces of 12x12 patterned paper -- you'll cut 18 5.5" squares from these pieces, so you can do it in 5 sheets, but depending on how you've designed your book, you may need 6 sheets to coordinate the colors.
24" length of 1" wide ribbon -- this will tie your book shut, so it depends on your preference-it could be any width, twine, whatever.
Of course, you will also need your standard scrapping supplies: a 12" paper cutter, tape runner, embellishments and photos (wallet sizes are perfect)!
What to do:
1. Cut the front and back cover to 10x10 from two sheets of patterned paper.
2. Fold all four corners of the patterned paper chosen for your front cover on one of the foam cores and tape (or glue); then fold each of the sides in, like you are wrapping a present and tape down. Repeat for the back cover.
Aly's heavyweight paper needed tacky glue to keep it from popping back up. Mine worked fine with a tape runner.
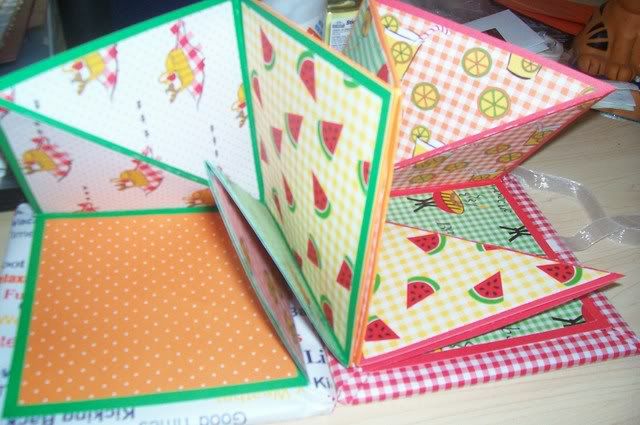
3. Fold each sheet of the card stock in half both ways so there are four 6x6 squares outlined. Make one fold from corner to corner. Use a bone folder to make sharp edges that fold both ways.
4. Overlap one sheet of cardstock with the other two by covering the 6x6 squares of the cardstock with another 6x6 square.
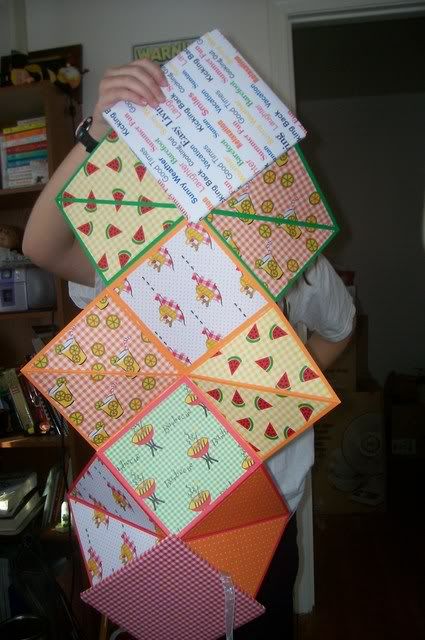 5. Cut 18 5.5" squares from the remaining patterned paper. This paper will line the cardstock, leaving 1/4" border in each section. Once you have arranged the patterns on the front of the cardstock, cut the squares that lie on the folded sections from corner to corner.
6. Mix and match the patterns of the triangles and tape all of the patterned paper down. You can see that Aly & I kept our triangles together.
7. Turn the cardstock over and repeat on the back side. Note that the 6x6 squares on either end of the back side remain free of patterned paper, as this will be where the covers are attached.
8. Place the back cover patterned paper side down and tape/glue the center of the ribbon to the center of the foam core.
9. Fold the cardstock pages in on each other to form a 6x6 stack and lay on top of your back cover/ribbon. Place the opening of the pages in the lower right corner and affix the back cover.
10. Affix the front cover to the stack and tie the ribbon on top.

posted by Tonya at
10:31 PM
![]()


 My
My 

2 Comments:
:faint: You lost me at step one but they look awesome!! Way to go!
i especially liked your model...beautiful job by both you and Aly!!!
Post a Comment
Subscribe to Post Comments [Atom]
<< Home